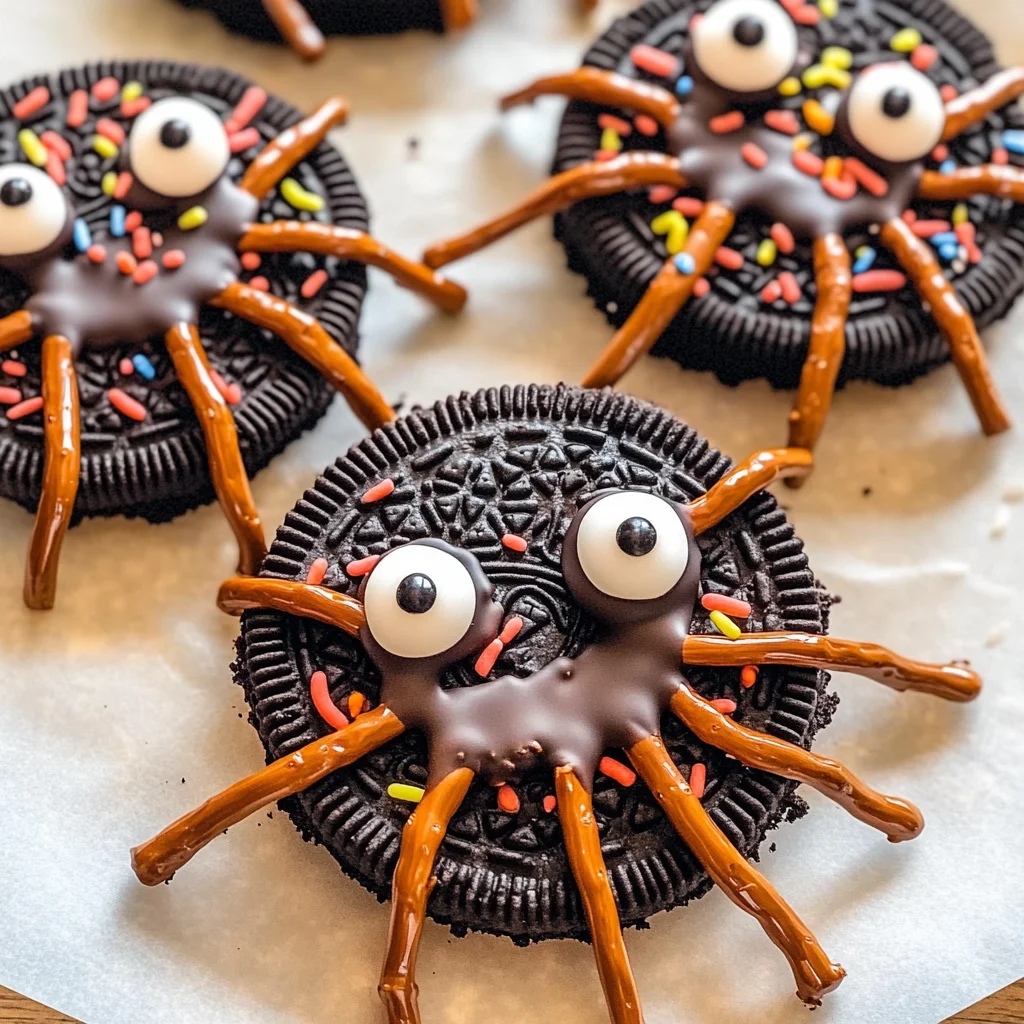
Get into the spooky spirit with these Oreo Spider Halloween Cookies! Perfect for Halloween parties or a fun family activity, these cookies are not only delightful to look at but also easy to make. With a combination of Oreo cookies, chocolate, and pretzel legs, they are sure to impress both kids and adults alike. Enjoy the fun of creating these tasty treats that double as festive decorations!
Why You’ll Love This Recipe
Fun for Everyone: Making Oreo spider Halloween cookies is a great activity for kids and adults alike. Get creative with decorating!
Quick and Easy: With just 20 minutes of prep time, you can whip up these spooky snacks in no time.
Deliciously Sweet: The combination of chocolate, Oreos, and candy eyeballs makes for a sweet treat that everyone will love.
Customizable: Feel free to mix up the toppings or use different types of candies to create your own unique spiders.
Tools and Preparation
Before you start baking your Oreo spider Halloween cookies, gather your tools and equipment. Having everything ready will make the process smoother and more enjoyable.
Essential Tools and Equipment
Microwave
Small bowl
Baking sheet
Refrigerator
Importance of Each Tool
Microwave: Quickly melts chocolate chips for easy coating on your cookies.
Small bowl: Perfect size for mixing melted chocolate with coconut oil without making a mess.
Baking sheet: A convenient surface to place your decorated cookies while they set in the fridge.
Refrigerator: Helps harden the chocolate quickly so you can enjoy your treats sooner.
Ingredients
To create these delicious Oreo spider Halloween cookies, you’ll need the following ingredients:
For the Spiders
1/2 cup chocolate chips (dairy free)
1 teaspoon coconut oil
12 Oreo cookies (Halloween kind or double stuffed)
36 pretzel sticks
12 dozen small candy eyeballs
3 tablespoons sprinkles
How to Make Oreo Spider Halloween Cookies
Step 1: Melt the Chocolate
Start by preparing the melted chocolate mixture.
1. In a small bowl, combine 1/2 cup of chocolate chips and 1 teaspoon of coconut oil.
2. Microwave for about one minute until fully melted, stirring halfway through.
Step 2: Assemble the Spider Legs
Now it’s time to make those creepy spider legs!
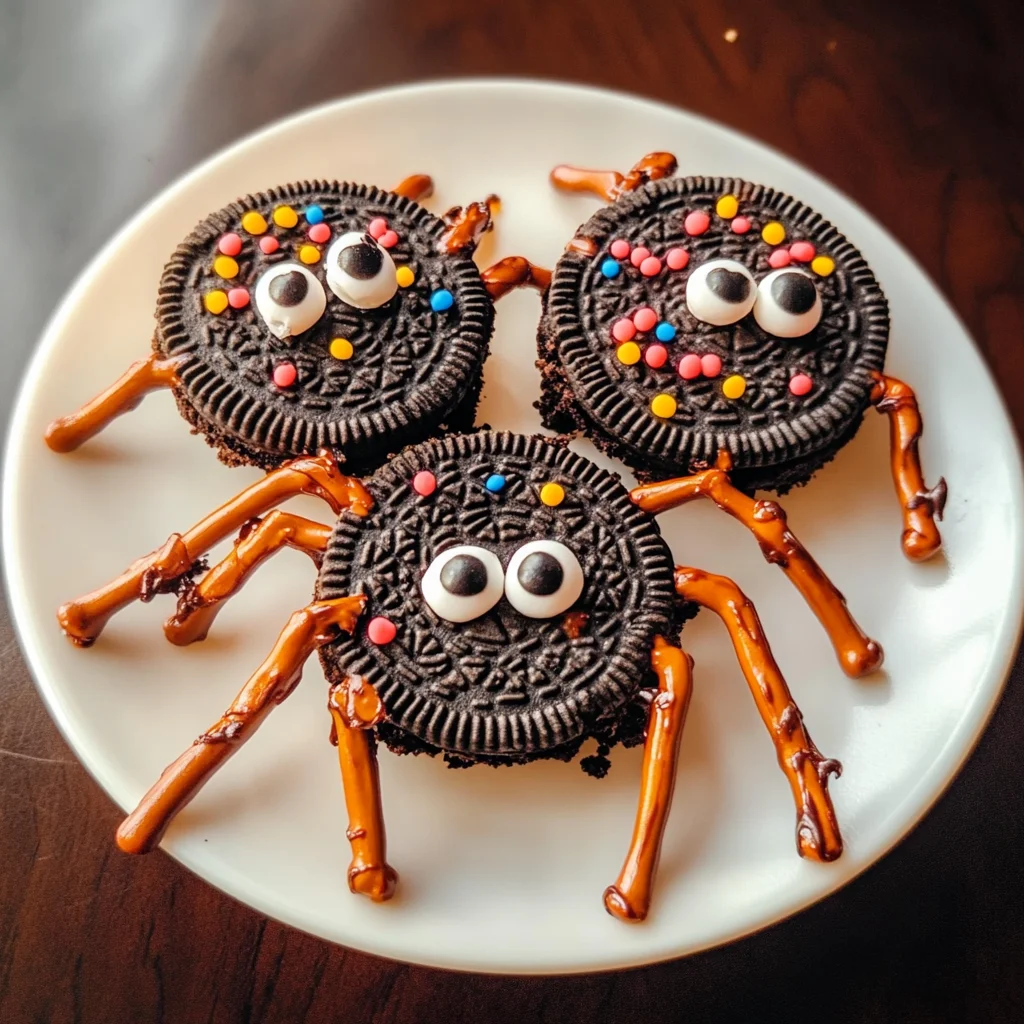
1. Break 3 pretzel sticks in half to create six legs per cookie.
2. Twist each Oreo to remove the top wafer (the blank side).
3. Press three pretzel stick halves into the cream side of the Oreo.
4. Pour about 1/2 teaspoon of melted chocolate on top of the pretzels before pressing the ‘blank’ Oreo wafer back on top.
Step 3: Decorate Your Cookies
Add some spooky details to your spiders!
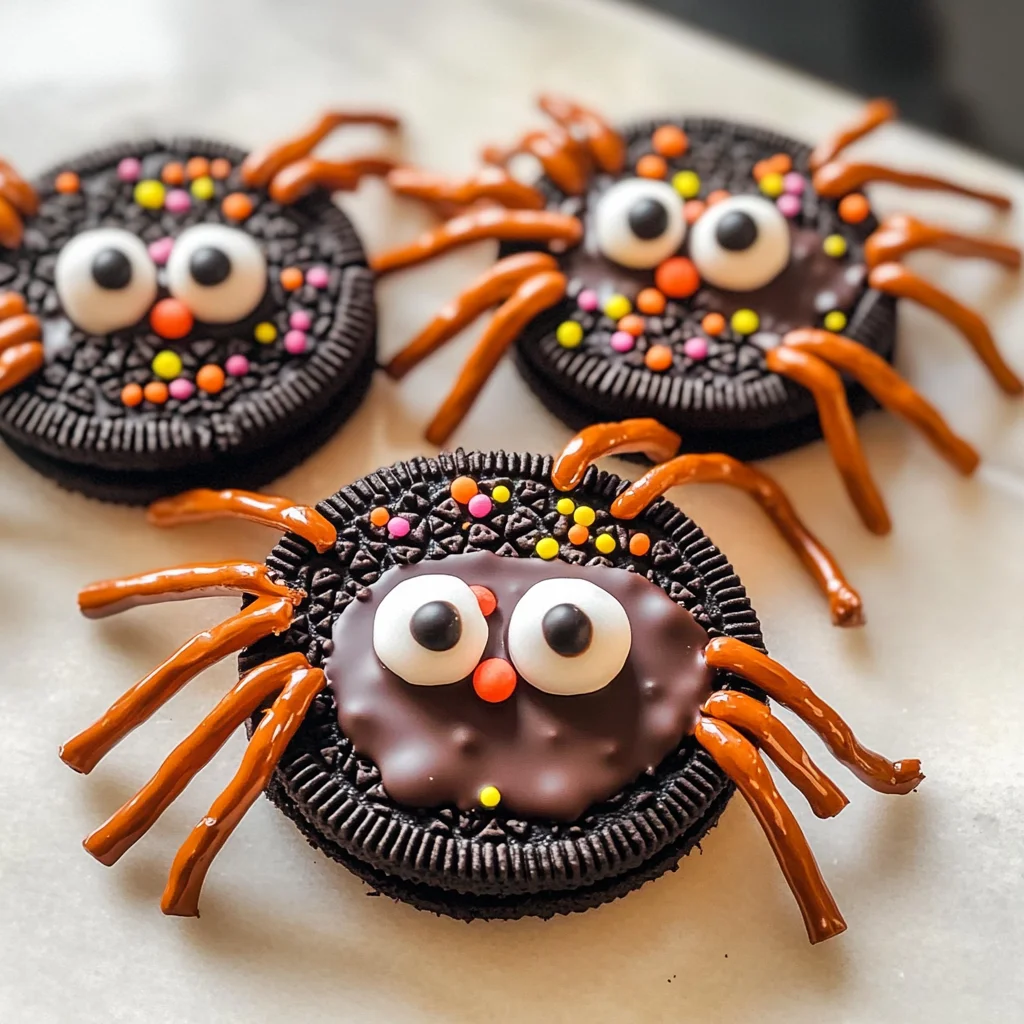
1. Dip one side of each assembled cookie into the melted chocolate.
2. Place a couple of candy eyes on top and sprinkle with colorful sprinkles.
Step 4: Chill and Enjoy
Finish off your spooky treats:
1. Place the cookies in the refrigerator for at least 10 minutes or until the chocolate hardens.
2. Once set, enjoy your tasty creations!
These Oreo spider Halloween cookies are not just fun to make but also perfect for any Halloween gathering!
How to Serve Oreo Spider Halloween Cookies
These Oreo spider Halloween cookies are perfect for sharing at any spooky gathering. Here are some fun serving suggestions to make your Halloween party even more festive.
Creative Platter Ideas
Spider Web Display: Arrange the cookies on a platter, and use black string licorice to create a spider web effect around them.
Themed Cupcake Stand: Stack cookies on a tiered cupcake stand, mixing in fake spiders and autumn leaves for decoration.
Fun Pairings
Milk or Plant-based Milk: Serve alongside a glass of cold milk or almond milk for a classic treat experience.
Halloween Punch: Pair with a spooky punch made from fruit juices and served in fun skull-shaped cups.
Kid-friendly Presentation
Cookie Bags: Place each cookie in clear treat bags tied with orange ribbon for individual servings.
Dessert Table: Create a dessert table featuring these cookies alongside other Halloween treats, like ghost cupcakes or pumpkin-shaped candies.
How to Perfect Oreo Spider Halloween Cookies
Making these Oreo spider Halloween cookies is easy, but a few tips can enhance your results. Follow these steps for the best outcome!
Use Fresh Ingredients: Ensure that your chocolate chips and Oreos are fresh for the best flavor and texture.
Melt Chocolate Properly: Heat the chocolate chips just until melted; overheating can cause them to seize up.
Experiment with Toppings: Get creative with different types of sprinkles or candy eyes to personalize each cookie.
Chill Well: Allow enough time in the fridge for the chocolate to set completely; this helps maintain the cookie structure when served.
Best Side Dishes for Oreo Spider Halloween Cookies
Complement your Oreo spider Halloween cookies with some delightful side dishes that add variety to your Halloween spread. Consider these options:
Pumpkin Soup: A creamy pumpkin soup served in small cups makes for a warm and inviting side dish.
Veggie Platter: Offer an assortment of colorful veggies with hummus, creating a healthy contrast to sweet treats.
Ghostly Cheese Sticks: Wrap cheese sticks in white cloth and draw ghost faces with edible markers for fun finger foods.
Bat-shaped Sandwiches: Cut sandwiches into bat shapes using cookie cutters, filling them with turkey or veggies.
Spooky Fruit Skewers: Thread fruit pieces onto skewers, alternating colors to make it visually appealing.
Witch’s Brew Salad: Toss mixed greens with purple cabbage and edible flowers for an enchanting salad option.
Common Mistakes to Avoid
When making Oreo spider Halloween cookies, it’s easy to miss a step. Here are some common mistakes to watch out for:
Ignoring the chocolate melting time – If you microwave the chocolate chips too long, they may burn. Start with one minute and check frequently until melted.
Using stale Oreos – Old cookies can ruin the texture. Always use fresh Oreo cookies for the best results.
Not allowing chocolate to harden – Skipping the refrigeration step can lead to messy cookies. Always chill them for at least 10 minutes for proper setting.
Overloading on sprinkles or eyes – While it’s fun to decorate, too many toppings can make them difficult to eat. Keep it simple for the best presentation and taste.
Forgetting about allergen substitutions – Ensure all ingredients are allergy-friendly. Use dairy-free chocolate and verify other ingredients as needed.
Storage & Reheating Instructions
Refrigerator Storage
Store in an airtight container for up to 5 days.
Keep layers separated with parchment paper to avoid sticking.
Freezing Oreo Spider Halloween Cookies
Freeze in an airtight container for up to 2 months.
Place parchment paper between layers for extra protection.
Reheating Oreo Spider Halloween Cookies
Oven – Preheat to 350°F (175°C) and warm cookies for about 5 minutes for freshness.
Microwave – Heat individually on low power for 10-15 seconds. Be cautious not to melt the chocolate further.
Stovetop – Place in a pan on low heat, covered, just until slightly warm.
Frequently Asked Questions
Here are some common questions about making Oreo spider Halloween cookies.
How do I make Oreo Spider Halloween Cookies gluten-free?
You can use gluten-free Oreo alternatives available in stores. Check labels carefully when selecting your ingredients.
Can I customize the toppings on my Oreo Spider Halloween Cookies?
Absolutely! Feel free to use different types of sprinkles or edible glitter to match your Halloween theme.
What if I can’t find candy eyeballs?
You can use small chocolate chips or even cut-out pieces of fruit leather as a fun alternative!
Are Oreo Spider Halloween Cookies suitable for kids?
Yes! These cookies are fun and safe for children under supervision, especially during decorating time.
How do I store leftover Oreo Spider Halloween Cookies?
Store them in an airtight container in the refrigerator or freeze them as outlined above.
Final Thoughts
Oreo spider Halloween cookies are a delightful treat that combines fun and creativity, perfect for any Halloween gathering. Their versatility allows you to customize toppings and shapes, making them suitable for both kids and adults alike. Try making these spooky snacks with family or friends—everyone will love them!
Get into the spooky spirit with Oreo Spider Halloween Cookies! These delightful treats are a fun and easy project for families or Halloween gatherings. With a creative combination of classic Oreo cookies, dairy-free chocolate, and pretzel legs that resemble creepy spider limbs, these cookies are sure to impress guests of all ages. Whether you’re hosting a party or looking for a festive activity with the kids, these cookies not only taste great but also make an eye-catching centerpiece. Customize them with different toppings and enjoy making these sweet, spooky snacks!
Ingredients
Scale
1/2 cup dairy-free chocolate chips
1 teaspoon coconut oil
12 Oreo cookies (Halloween or double-stuffed)
36 pretzel sticks
12 small candy eyeballs
3 tablespoons colorful sprinkles
Instructions
Melt chocolate chips with coconut oil in a microwave-safe bowl for about one minute, stirring halfway until smooth.
Break each pretzel stick in half to create six legs per cookie. Twist Oreos to separate and press three pretzel halves into the cream side of each.
Drizzle melted chocolate over pretzels and reassemble Oreos.
Dip one side of each cookie in melted chocolate, add candy eyeballs, and sprinkle with colorful decorations.
Chill in the refrigerator for at least 10 minutes until set before serving.
Prep Time:20 minutes
Cook Time:0 minutes
Category:Dessert
Method:No cooking required
Cuisine:American
Nutrition
Serving Size:1 cookie
Calories:150
Sugar:9g
Sodium:50mg
Fat:7g
Saturated Fat:4g
Unsaturated Fat:2g
Trans Fat:0g
Carbohydrates:20g
Fiber:1g
Protein:1g
Cholesterol:0mg
Keywords: Experiment with different types of sprinkles or edible glitter for unique designs. For added fun, use alternative toppings like mini marshmallows or colored sugar.