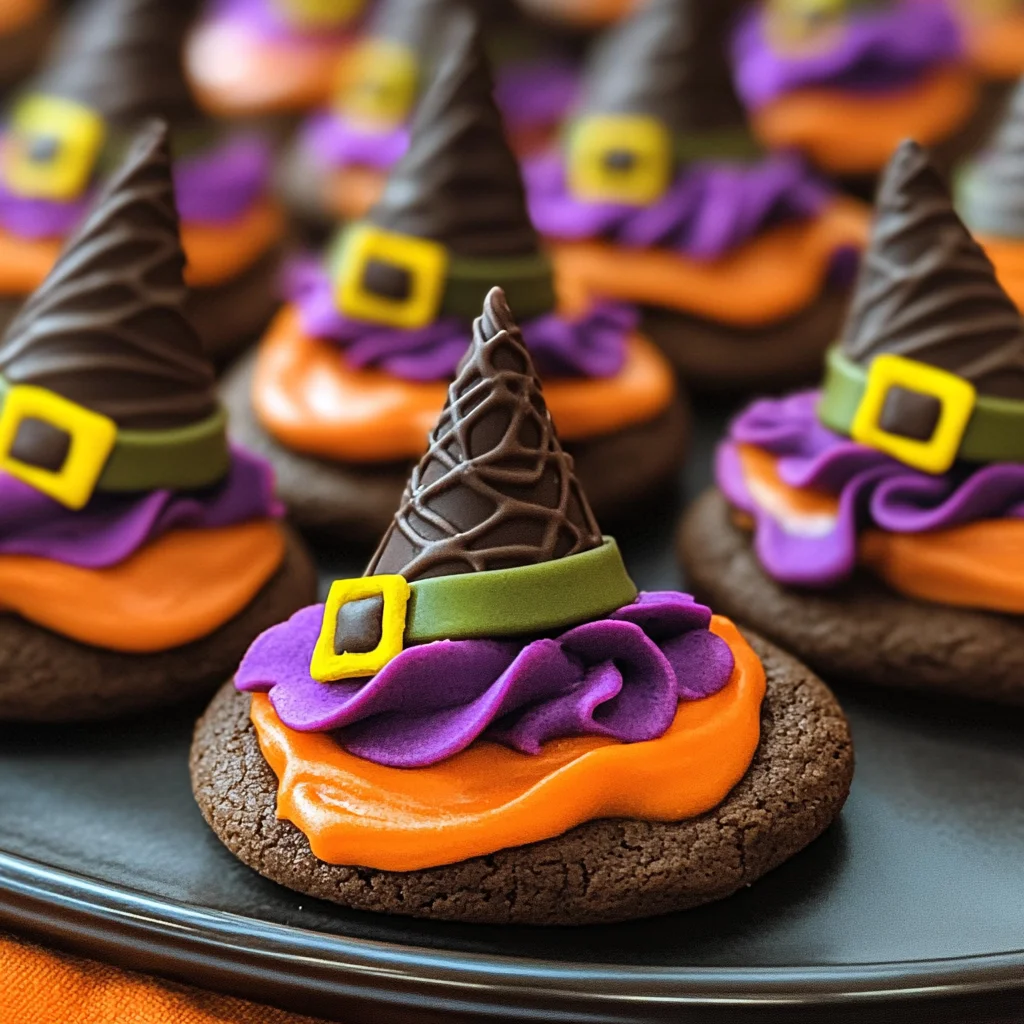
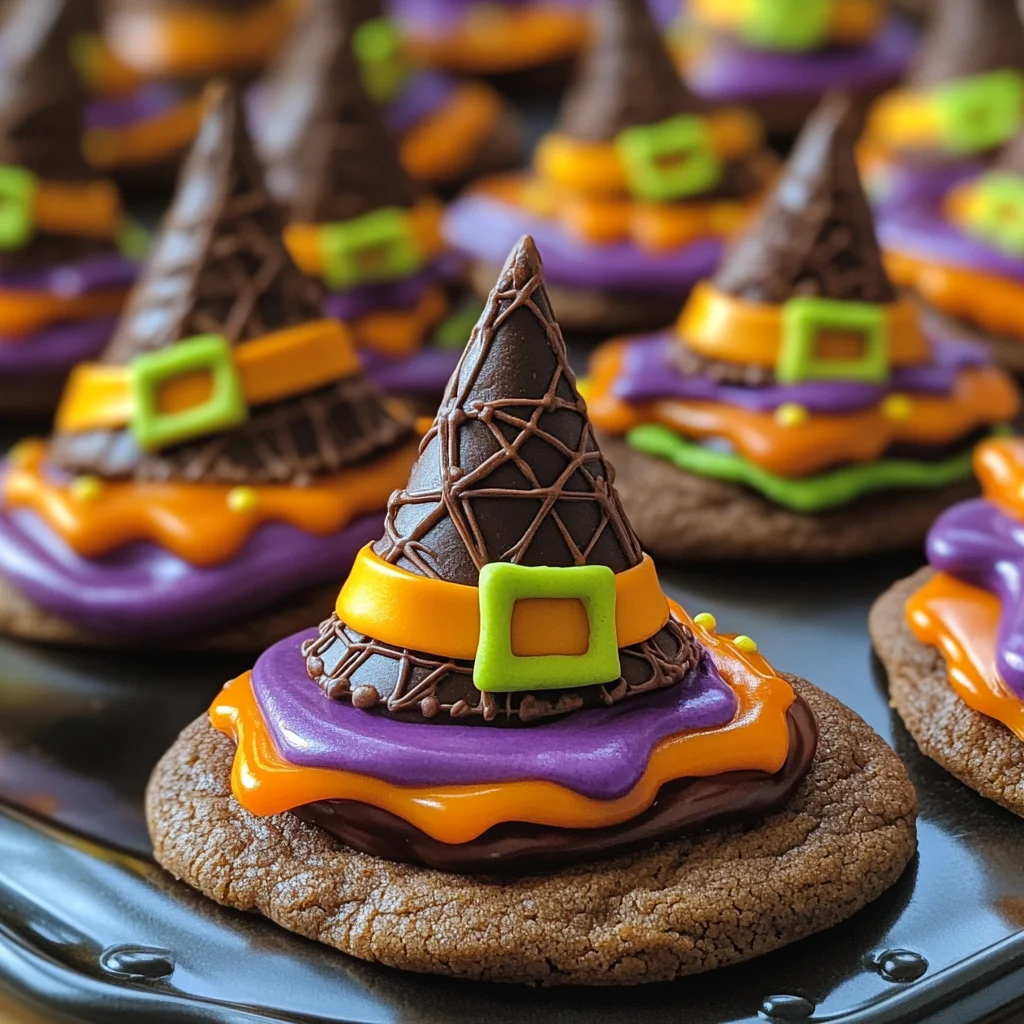
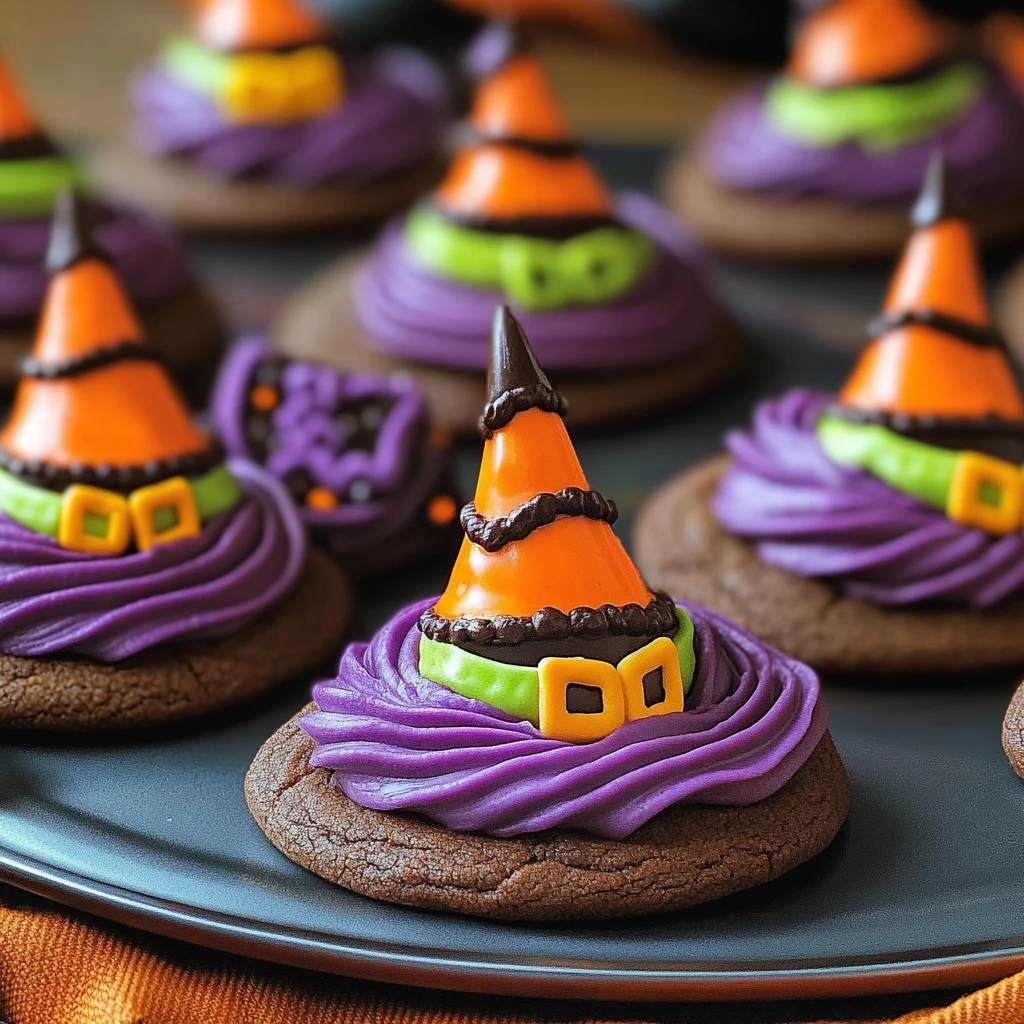
These Halloween Witch Hat Cookies are a delightful treat that will enchant your Halloween festivities. With their whimsical design and delicious flavors, they are perfect for parties, school events, or just a fun family baking day. These cookies not only look impressive but also offer a fun project to do with the kids, making them a fantastic way to celebrate the spooky season.
Why You’ll Love This Recipe
Fun and Creative: Kids and adults alike will enjoy decorating these cookies in unique and imaginative ways.
Customizable: Use different colors and designs to create witch hats that suit your personal style or party theme.
Easy to Follow: The step-by-step instructions make this recipe accessible for bakers of all skill levels.
Perfect for Parties: These cookies are ideal for Halloween gatherings, bringing smiles to everyone who sees (and tastes) them.
Delicious Flavors: The combination of chocolate cookies with sweet icing is sure to please any dessert lover.
Tools and Preparation
To make these Halloween Witch Hat Cookies, you’ll need some basic tools to help you along the way. Having the right equipment makes the process smoother and more enjoyable.
Essential Tools and Equipment
Baking sheet
Cupcake Cones Baking Rack
Parchment paper
Decorating bags
Icing tips (2B and 3)
Importance of Each Tool
Baking sheet: Ensures even baking of your cones, providing a sturdy base for your cookie creations.
Cupcake Cones Baking Rack: This specialized rack holds your sugar cones upright, allowing for perfectly baked cakes without any mess.
Decorating bags: Essential for applying icing with precision; they allow you to create beautiful designs on your cookies.
Ingredients
These are the ingredients you’ll need to create your Halloween Witch Hat Cookies:
For the Cookie Base
Favorite Cake Mix or Try Wilton’s Chocolate Cake Recipe
Store Bought Chocolate Cookies or Try This Recipe from Wilton
For the Icing Colors
Lemon Yellow Icing Color
Black Color Mist Food Coloring Spray
Rose Icing Colors Pink Food Coloring
Violet Icing Color, Gel Food Coloring
Golden Yellow Icing Color
Orange Icing Color
For Assembly
Sugar Cones
Creamy White Decorator Icing, 4 lb. Tub
How to Make Halloween Witch Hat Cookies
Step 1: Prepare & Bake the Cones
Prepare the cake mix following the chosen recipe’s instructions. Place the Cupcake Cones Baking Rack on a baking sheet. Insert sugar cones into the rack and fill each cone with 2 tablespoons of cake batter. Bake according to your recipe’s timing instructions, then allow them to cool completely.
Step 2: Spray the Cones
If needed, trim the top of each baked cake cone with a knife so it is level. Place cones wide side down on parchment paper. Using Black Color Mist, spray each cone black. Allow them to dry for about 10 to 15 minutes.
Step 3: Tint the Icing & Prepare the Bags
Tint 1 cup of creamy white decorator icing orange. For purple icing, tint another cup by mixing violet and rose icing colors together. Prepare two decorating bags fitted with tip 2B; fill one with orange icing and one with purple icing. Additionally, tint ¼ cup of creamy white decorator icing yellow by mixing golden yellow and lemon yellow colors; place this in a decorator bag fitted with tip 3.
Step 4: Assemble the Witch Hats
Using orange icing, pipe a small amount in the center of a cookie. Place a cone on top of this cookie. With smooth side facing out, pipe a band around the wide end of half the cones; smooth it out using a spatula. Repeat this process using purple icing on the remaining cookies and cones. Let them set for about 15 to 20 minutes. Finally, use yellow tinted icing with tip 3 attached to pipe buckles around the bands on all hats. Allow them to set for another 15 to 20 minutes before enjoying!
How to Serve Halloween Witch Hat Cookies
These Halloween Witch Hat Cookies are not just delicious; they are also a delightful addition to any Halloween gathering. Here are some fun ways to serve them and make your Halloween party even more magical.
For a Themed Dessert Table
Create a spooky dessert table featuring your witch hat cookies alongside other Halloween treats like ghost cupcakes or pumpkin cake pops for a festive atmosphere.
At a Kids’ Halloween Party
Set up a decorating station where kids can customize their witch hat cookies with extra icing, sprinkles, or edible eyes for added fun.
As Party Favors
Package individual cookies in clear bags tied with orange ribbons. These make great take-home treats that guests will love!
With Hot Chocolate
Serve the cookies alongside warm mugs of hot chocolate topped with whipped cream. The combination is perfect for chilly October nights.
As Classroom Treats
Bring these cookies to school celebrations. They’re easy to share and add a touch of creativity to the classroom festivities.
How to Perfect Halloween Witch Hat Cookies
To make your Halloween Witch Hat Cookies truly stand out, consider these helpful tips.
Use Fresh Ingredients: Always use fresh ingredients, especially the cake mix and icing, for the best flavor and texture.
Chill Icing: Chilling your icing before using it can help create cleaner lines and shapes when piping onto the cookies.
Color Mixing: Experiment with different color combinations for icing to create unique looks for your witch hats.
Even Baking: Ensure even baking by rotating your cookie sheet halfway through baking time, leading to uniformly cooked cookies.
Allow Setting Time: Don’t rush the setting process after decorating; letting the icing set properly helps maintain the design.
Best Side Dishes for Halloween Witch Hat Cookies
Pairing side dishes with your Halloween Witch Hat Cookies can elevate your dessert spread. Here are some delicious options that complement these festive treats:
Pumpkin Soup: A creamy pumpkin soup adds warmth and flavors of fall, perfect for balancing sweet desserts.
Ghostly Veggie Platter: Arrange vegetables in a ghost shape and serve with a spooky dip like ranch or hummus.
Monster Eye Meatballs: These meatballs can be made with beef or turkey, topped with mozzarella cheese and olives for an eye-catching look.
Spooky Snack Mix: Create a mix of popcorn, pretzels, and chocolate candies shaped like bats or spiders for an easy-to-serve treat.
Witch’s Brew Punch: A fruity punch made with lemon-lime soda and fruit juices adds a refreshing drink option to your dessert table.
Candy Corn Fruit Cups: Layer orange melon, pineapple, and whipped cream in cups to resemble candy corn for a healthy yet festive treat.
Common Mistakes to Avoid
Avoiding mistakes can make your Halloween Witch Hat Cookies a success. Here are some common pitfalls and how to steer clear of them.
Not measuring ingredients accurately: Ensure you measure all cake mix and icing accurately for consistent results. Use measuring cups and spoons for precision.
Overbaking the cones: Keep an eye on the baking time to prevent dry cones. Follow the recommended time in your cake recipe closely.
Skipping the cooling step: Allow the cones to cool completely before decorating. This prevents the icing from melting and helps it adhere better.
Not using enough icing: Make sure to apply a generous amount of icing when attaching the sugar cones to the cookies. This will help secure them in place.
Ignoring color mixing tips: Take your time when tinting your icing. Mixing colors gradually ensures you achieve the desired shades without overshooting.
Storage & Reheating Instructions
Refrigerator Storage
Store cookies in an airtight container.
They will last for up to 5 days in the refrigerator.
Freezing Halloween Witch Hat Cookies
Wrap each cookie tightly in plastic wrap.
Place them in a freezer-safe container; they can be frozen for up to 3 months.
Reheating Halloween Witch Hat Cookies
Oven: Preheat the oven to 350°F (175°C) and warm cookies for about 5-10 minutes.
Microwave: Heat individual cookies on low power for about 10-15 seconds until warm.
Stovetop: Place cookies in a pan over low heat, cover, and warm for a few minutes.
Frequently Asked Questions
Here are some common questions about making Halloween Witch Hat Cookies.
What are Halloween Witch Hat Cookies?
Halloween Witch Hat Cookies are delicious chocolate treats made with cake mix, decorated like witch hats using colorful icing and sugar cones.
How can I customize my Halloween Witch Hat Cookies?
You can customize by using different colors of icing, adding sprinkles, or even using various cookie bases instead of chocolate.
Can I use homemade cake mix for these cookies?
Yes! Feel free to use your favorite homemade chocolate cake recipe instead of store-bought mix for a personal touch.
How do I store leftover Halloween Witch Hat Cookies?
Store leftover cookies in an airtight container at room temperature or refrigerate them for longer freshness.
Final Thoughts
These Halloween Witch Hat Cookies are a delightful treat that brings fun and creativity into your kitchen. With plenty of opportunities for customization, they’re perfect for any Halloween celebration. Get creative with colors and designs, and enjoy this festive baking project with family or friends!
Create spooky and fun Halloween Witch Hat Cookies! Perfect for parties, these treats will delight kids and adults alike—try them today!
Ingredients
Chocolate cake mix or homemade chocolate cookie dough
Sugar cones
Creamy white decorator icing
Lemon yellow icing color
Black color mist food coloring spray
Rose icing colors pink food coloring
Violet icing color, gel food coloring
Golden yellow icing color
Orange icing color
Instructions
Preheat your oven and prepare your cookie base according to your chosen recipe.
Fill sugar cones with cake batter and bake on a cupcake cone rack until cooked through. Allow cooling.
Level the tops of baked cones if necessary and spray with black color mist; let dry.
Tint decorator icing in orange, purple, and yellow as desired.
Pipe icing onto cookies to assemble your witch hats by attaching the cones to the cookies and adding decorative details.
Let decorated cookies set before serving.
Prep Time:30 minutes
Cook Time:15 minutes
Category:Dessert
Method:Baking
Cuisine:American
Nutrition
Serving Size:1 cookie (45g)
Calories:150
Sugar:15g
Sodium:90mg
Fat:5g
Saturated Fat:2g
Unsaturated Fat:3g
Trans Fat:0g
Carbohydrates:24g
Fiber:1g
Protein:2g
Cholesterol:10mg
Keywords: Experiment with different colors of icing for unique designs. Add edible decorations like sprinkles or candy eyes for extra flair. If using homemade cake mix, ensure it’s well-balanced for optimal texture.