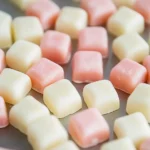
Wedding mints are a delightful treat that adds a touch of sweetness to any celebration. These traditional butter mints, made with fresh ingredients like unsalted butter and peppermint extract, are perfect for weddings, baby showers, or any festive gathering. Their soft texture and customizable colors make them an appealing choice for party favors or as a refreshing after-meal treat.
Why You’ll Love This Recipe
Easy to Make: With just a few simple steps, you can whip up a batch of these delicious mints in no time.
Customizable Colors: You can easily tailor the color of your mints to match any event theme or personal preference.
Perfect for Any Occasion: Whether it’s a wedding, birthday party, or baby shower, these mints fit seamlessly into any celebration.
Melt-in-Your-Mouth Texture: The creamy consistency provides a delightful experience that guests will love.
Versatile Flavor Options: While peppermint is traditional, feel free to experiment with other extracts to create unique flavors.
Tools and Preparation
To create the perfect wedding mints, having the right tools is essential. Here’s what you’ll need to get started.
Essential Tools and Equipment
Stand mixer or electric mixer
Mixing bowls
Measuring cups
Measuring spoons
Wax paper
Importance of Each Tool
Stand mixer or electric mixer: Saves time and effort by thoroughly mixing the ingredients quickly.
Mixing bowls: Necessary for combining ingredients while keeping your workspace organized.
Measuring cups and spoons: Ensure accurate measurements for perfect taste and texture in your mints.
Ingredients
Traditional butter mints made with fresh butter, powdered sugar, and peppermint extract. Customize colors for any occasion.
For the Mints
½ cup unsalted butter, softened
4 cups powdered sugar
¼ teaspoon peppermint extract
⅛ teaspoon vanilla extract
⅛ teaspoon salt
1½ tablespoons heavy cream
Food coloring (optional)
How to Make Wedding Mints
Step 1: Cream the Butter
Begin by beating the unsalted butter in your stand mixer or with an electric mixer until it becomes creamy.
Step 2: Add Powdered Sugar
Gradually mix in 2 cups of powdered sugar. Start on low speed to prevent a sugar cloud until combined.
Step 3: Incorporate Extracts and Salt
Add the peppermint extract, vanilla extract, and salt. Mix until everything is well blended.
Step 4: Add Heavy Cream
Pour in the heavy cream. Increase the mixer speed to medium and blend until smooth.
Step 5: Finish with Remaining Sugar
Add the remaining 2 cups of powdered sugar. Mix until you achieve a playdough-like consistency. If desired, include food coloring at this stage.
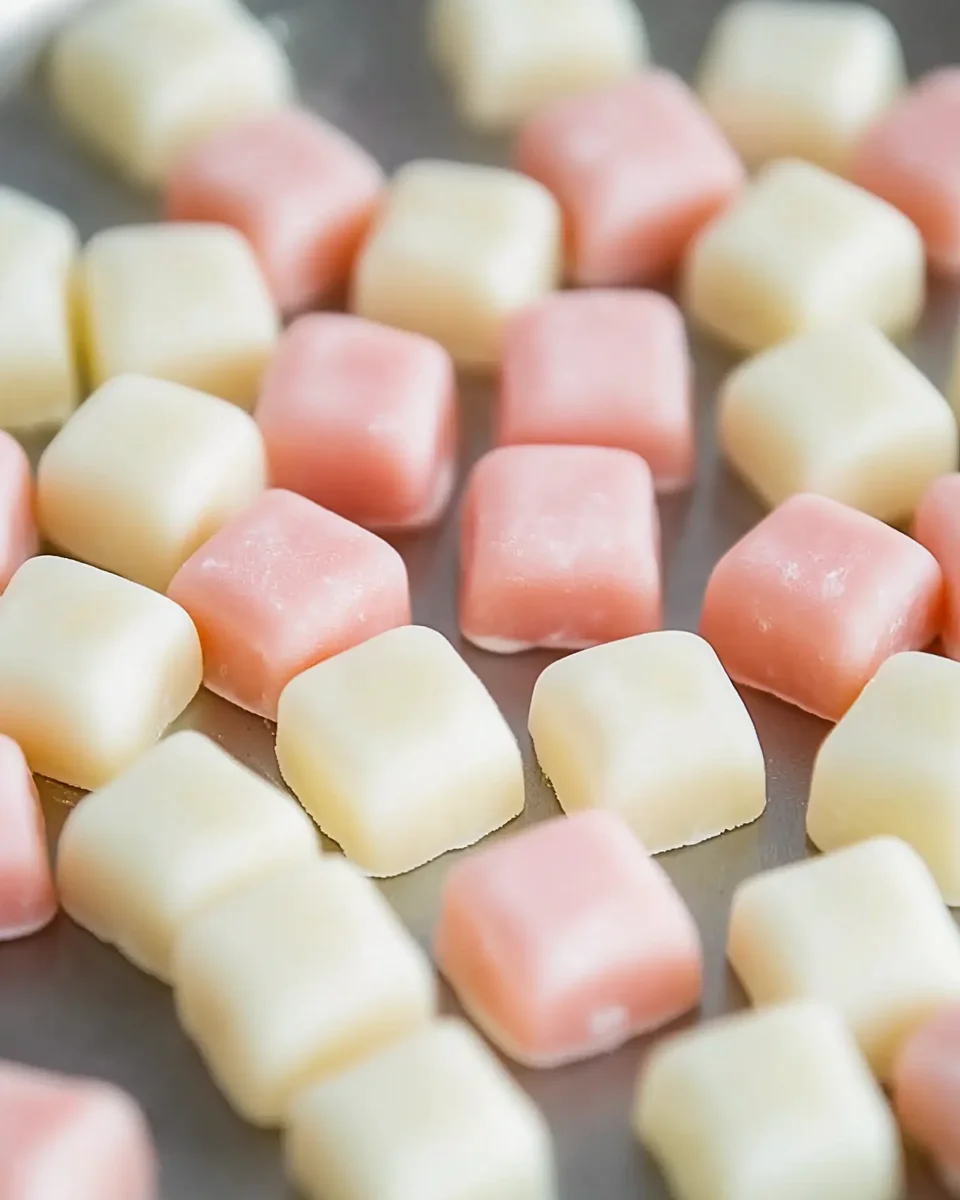
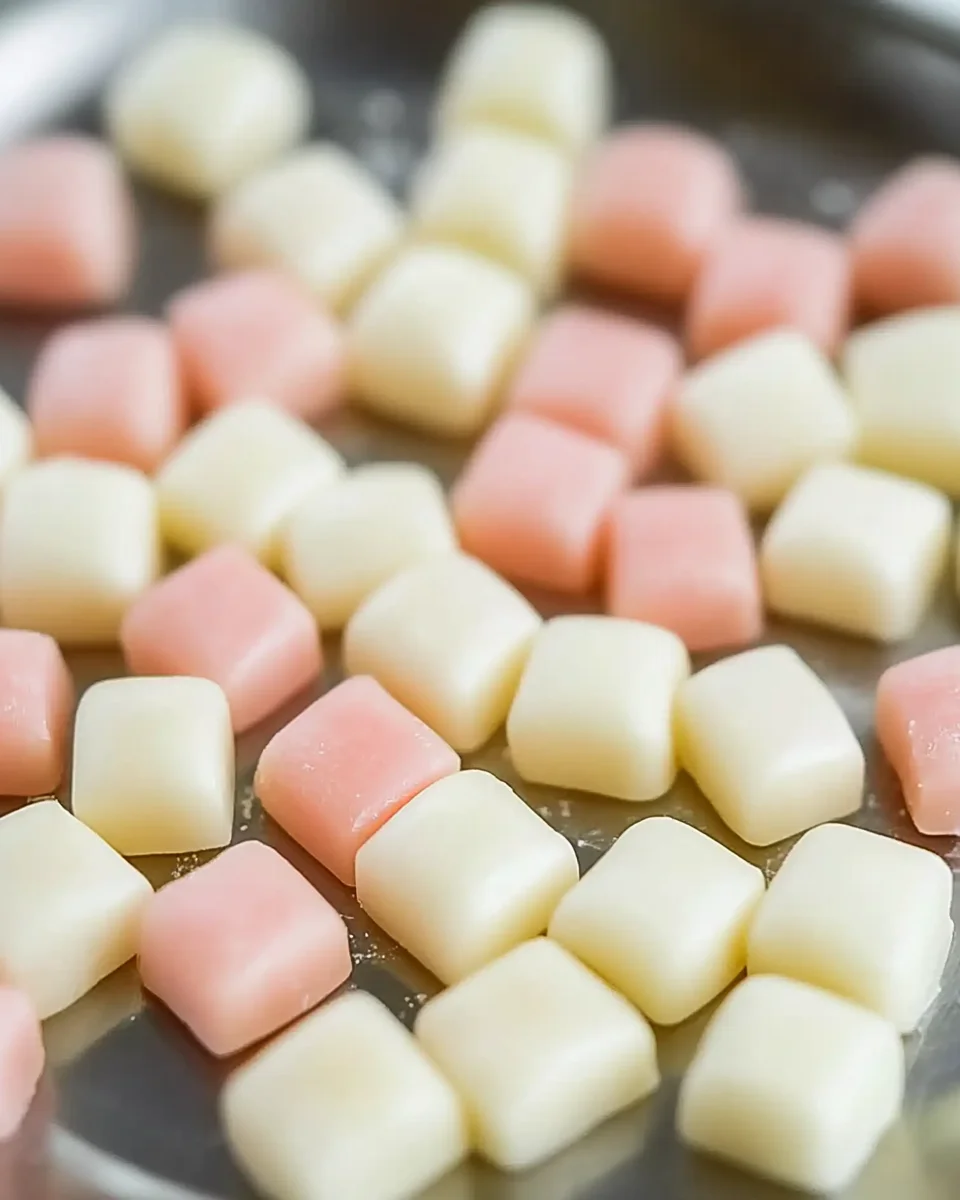
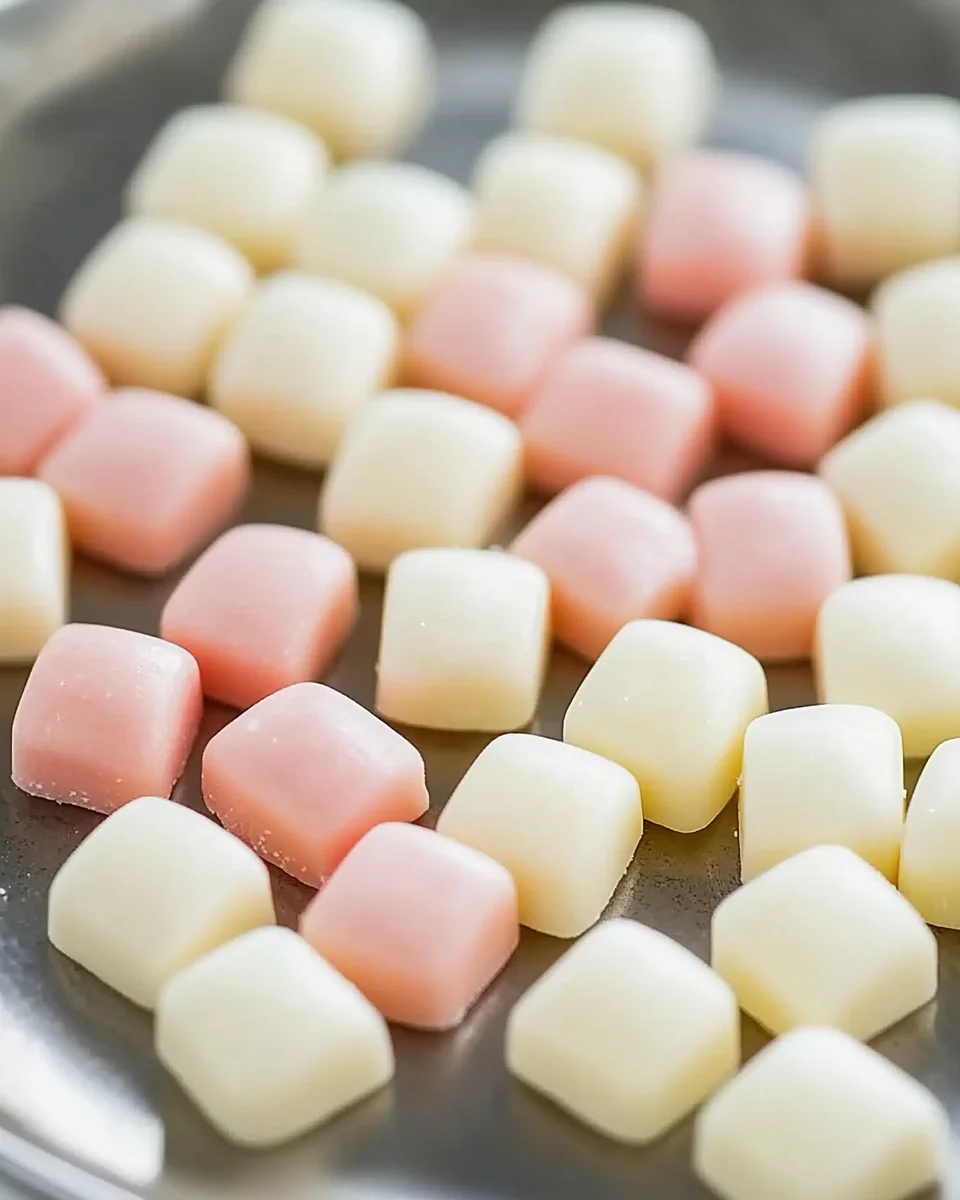
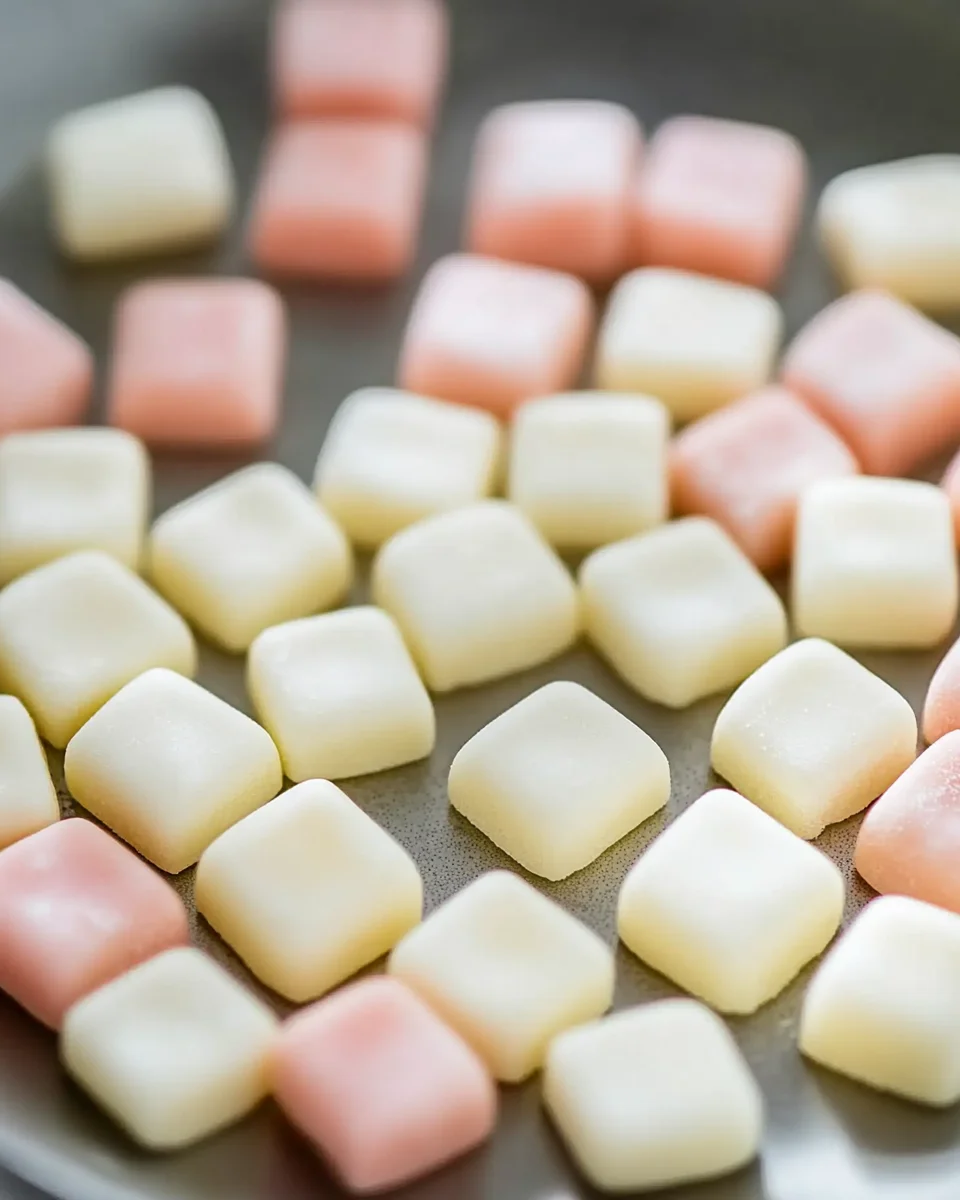
Step 6: Shape the Mints
Roll the mixture into ½-inch logs. Cut these logs into small pieces. Place them on a wax paper-lined sheet.
Step 7: Let Them Dry
Allow the mints to dry uncovered at room temperature for several hours until they become firm.
With these simple steps, you’ll have delightful wedding mints that are sure to impress! Enjoy sharing them at your next gathering!
How to Serve Wedding Mints
Wedding mints are a delightful treat that can be served in various ways. They are not only a perfect addition to wedding receptions but also suitable for baby showers, birthday parties, and other festive gatherings.
As Party Favors
Cute Packaging: Place mints in small organza bags or decorative boxes for guests to take home.
Personalized Labels: Add a personal touch with labels featuring the couple’s names and wedding date.
On Dessert Tables
Color Coordinated: Match the color of the mints to your wedding theme for a cohesive look.
Variety Tray: Include different flavors or colors of mints alongside other desserts for an eye-catching display.
With Drinks
Minty Refreshment: Serve wedding mints alongside cocktails or mocktails for a refreshing pairing.
Tea Time Treats: Offer them as a sweet accompaniment to tea or coffee at your reception.
During The Reception
Interactive Stations: Set up a mint station where guests can scoop their own mints into bags.
Table Settings: Place a few mints at each place setting as a sweet surprise for guests.
How to Perfect Wedding Mints
Making wedding mints is simple, but with these tips, you can ensure they turn out perfectly every time.
Use Softened Butter: Starting with softened butter helps achieve that creamy texture essential for smooth mixing.
Gradual Sugar Addition: Adding powdered sugar gradually prevents clumping and ensures even mixing.
Experiment with Flavors: While peppermint is traditional, try adding different extracts like chocolate or almond for variety.
Adjust Consistency Wisely: If the mixture is too dry, add more heavy cream slowly until you reach playdough consistency.
Coloring Matters: Use gel food coloring for vibrant hues; it requires less coloring and provides better results than liquid dyes.
Let Them Dry Fully: Ensure the mints dry uncovered at room temperature so they firm up properly without becoming sticky.
Best Side Dishes for Wedding Mints
Pairing side dishes with wedding mints can enhance your dessert table elegantly. Here are some delightful options to consider.
Cheese Platter: A selection of cheeses pairs well with the sweetness of mints, offering both savory and sweet flavors.
Fruit Skewers: Fresh fruit adds a refreshing touch and balances the sweetness of the mints beautifully.
Mini Cupcakes: Bite-sized cupcakes can complement your mint flavors while adding variety to the dessert table.
Chocolate Dipped Pretzels: The salty crunch of pretzels dipped in chocolate makes an excellent contrast to sweet mints.
Nut Mixes: A mix of nuts provides protein and crunch; consider spicing them lightly for extra flavor.
Brownie Bites: Rich brownie bites add depth to the dessert lineup and pair wonderfully with minty treats.
Common Mistakes to Avoid
Making Wedding Mints can be simple, but some common mistakes can affect the final result. Here are a few things to watch out for:
Using cold butter: Cold butter makes it hard to achieve the creamy texture needed. Always soften your butter before mixing.
Skipping the heavy cream: Omitting heavy cream can lead to a dry mixture. This ingredient adds moisture and helps achieve the perfect consistency.
Not measuring accurately: Accurate measurements are essential for balance in flavor and texture. Use precise measuring cups and spoons for best results.
Ignoring drying time: Rushing the drying process can result in mints that are too soft. Allow them to dry uncovered at room temperature until firm.
Forgetting food coloring adjustments: If you want colorful mints, don’t forget to mix in food coloring gradually. This ensures an even color throughout.
Storage & Reheating Instructions
Refrigerator Storage
Store Wedding Mints in an airtight container.
They will last up to 2 weeks in the refrigerator.
Freezing Wedding Mints
Freeze mints in a single layer on a baking sheet before transferring them to a freezer-safe bag or container.
Properly stored, they can last for up to 3 months in the freezer.
Reheating Wedding Mints
Oven: Preheat your oven to a low temperature (around 200°F). Place mints on a baking sheet for about 5-10 minutes until soft.
Microwave: Heat mints on a microwave-safe plate for about 10-15 seconds. Check frequently to avoid melting.
Stovetop: Use a double boiler with water simmering gently below. Place mints in the top section until they become soft.
Frequently Asked Questions
What are Wedding Mints?
Wedding mints are traditionally served at weddings and special occasions as sweet, buttery candies flavored with peppermint. They are easy to customize in color and shape.
Can I make Wedding Mints ahead of time?
Yes! You can prepare wedding mints days or even weeks in advance. Just store them properly in an airtight container or freeze them.
How do I customize my Wedding Mints?
You can customize wedding mints by adding different food coloring or using various flavor extracts like chocolate or vanilla instead of peppermint.
Are Wedding Mints gluten-free?
Yes, traditional wedding mints are gluten-free since they contain no flour or grains.
How long do homemade Wedding Mints last?
Homemade wedding mints can last up to two weeks when stored properly at room temperature or longer if refrigerated or frozen.
Final Thoughts
These Wedding Mints aren’t just delectable; they also offer incredible versatility for any celebration. Their delightful taste and customizable colors make them perfect for weddings, showers, or any festive occasion. Try making these fun treats and explore different colors and flavors for your next event!
Wedding mints are a charming addition to any celebration, offering a sweet, buttery treat that guests will adore. These traditional butter mints, flavored with peppermint extract, are not only easy to make but also customizable in color, making them perfect for weddings, baby showers, and various festive gatherings. With their melt-in-your-mouth texture and delightful flavor, they serve as wonderful party favors or refreshing after-meal treats. Impress your guests with these delightful confections that can be shaped into logs or any fun design you desire!
Ingredients
Scale
½ cup unsalted butter (softened)
4 cups powdered sugar
¼ teaspoon peppermint extract
⅛ teaspoon vanilla extract
⅛ teaspoon salt
1½ tablespoons heavy cream
Food coloring (optional)
Instructions
Cream the softened butter in a stand mixer until smooth.
Gradually add 2 cups of powdered sugar on low speed until combined.
Mix in the peppermint extract, vanilla extract, and salt until well blended.
Add heavy cream and increase the mixer speed to medium; blend until smooth.
Incorporate the remaining 2 cups of powdered sugar until you reach a playdough-like consistency.
Roll into ½-inch logs and cut into small pieces; place on wax paper.
Allow mints to dry uncovered at room temperature for several hours until firm.
Prep Time:15 minutes
Cook Time:None
Category:Dessert
Method:None
Cuisine:American
Nutrition
Serving Size:1 serving
Calories:33
Sugar:6g
Sodium:10mg
Fat:1g
Saturated Fat:0.5g
Unsaturated Fat:0.5g
Trans Fat:0g
Carbohydrates:8g
Fiber:0g
Protein:<1g
Cholesterol:5mg
Keywords: For vibrant colors, use gel food coloring. Experiment with different extracts like chocolate or almond for varied flavors. Ensure ingredients are measured accurately for the best results.